introduction
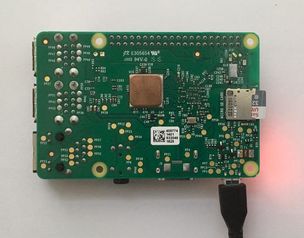
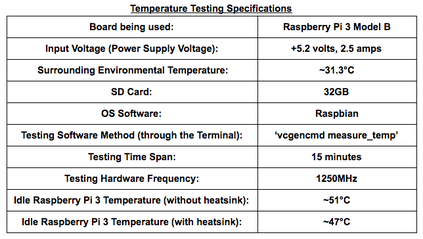
This Raspberry Pi RAM Copper Heatsink could be used for all the models of the Raspberry Pi 2 and 3 which is mainly suited for the RAM chip (Epida variant on RPI3). The heatsink is largely used for keeping the temperature down on the RAM chip as it could get pretty hot during runs of high-powered softwares or external devices due to the fact that heat from the overall board has to escape, and one path is through the underside of the Raspberry Pi; passing towards the direction of the Raspberry Pi RAM chip. Even though this copper heatsink may seem small, copper is a very good conductor of heat, so it could help bring the temperature down by dissipating heat from the chip quickly. Below are a few specifications as I have tested and a tutorial on how to set this product up on your Pi:
Setting it up
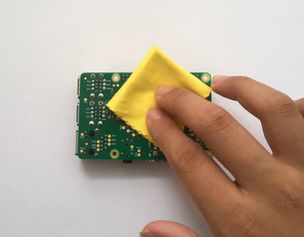
1. First, dust of any dirt and access dust from the RAM chip and the underside of your Raspberry Pi to prevent any interferences of the adhesive and its contact to the RAM chip. Also, as a safety precaution, make sure no power is applied to your Pi.
2. Tear of the adhesive tape gently off the back of the copper heatsink.
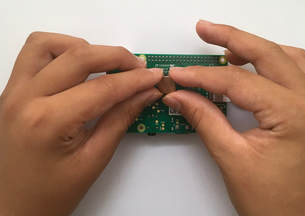
3. Position the RAM copper heatsink on top of the Raspberry Pi RAM chip straight with the exposed, teared-off side facing the chip itself.
4. Paste the heatsink on the chip; aligned properly and securely. Do this in one swift motion.
conclusion
After my observations and the test results, this product can only make a slight change in temperature, but when your Raspberry Pi is really hot, it can save it from crashing or throttling which is better than not having a heatsink at all. On my Raspberry Pi, this is a necessity as I always run media centres, gaming softwares and many programming softwares, thus, I need to get as much heat away from the Pi as possible. Overall, I think that this isn't a complete necessary product, but if you have it, that's an major advantage to you.
Make sure you check out the review for this product by clicking here.


