
introduction
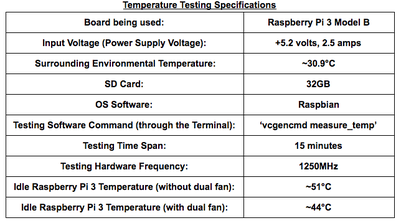
For any Raspberry Pi, cooling the board is very critical from preventing any potential permanent damage to its system; especially when running high-powered softwares, such as video games, media centres, graphics, etc.. A solution to this problem would be cooling, whether it is passive or active cooling. This project involves setting up an active cooling system involving a dual cooling fan and its supporting thermal tape for both the processor chip ( Broadcom BCM2837 SoC on RPI3) and the Ethernet chip (SMSC LAN9514 on RPI3) on-board. This cooling fan is compatible for the Raspberry Pi 2 and 3 along with their respective models. These products really help to bring down the Pi's temperature greatly as seen by the images below:
|
|
Setting it up

1. First, you would have to decide which thermal tape you will be using, the thicker thermal tape of the thiner thermal tape. The main purpose of thermal tape is to speed up the heat transfer from the bottom surface to the surface above the tape. So, in this case, the thermal tape will provide an adhesive for the dual fan and speed up the heat transfer to the dual fans for heat dissipation, thus, the thicker piece of tape is better. However, the thermal tape size mainly depends on the space you have on the Raspberry Pi and if there is another space to fit the dual fan with the case or without. The thicker thermal tape will be used as an example for this project.
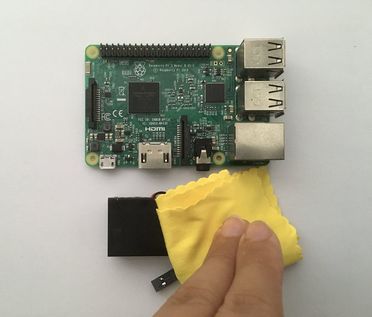
2. Before the further steps, make sure the Raspberry Pi surface and the dual fan surface is dusted off to prevent any interferences of the adhesive and there isn't any power applied to the Pi or the fan.
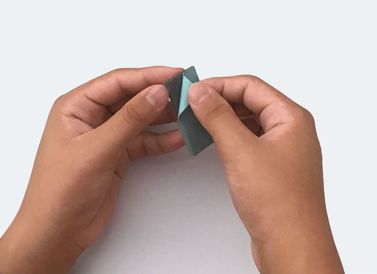
3. Peel of one side of the chosen thermal tape only.
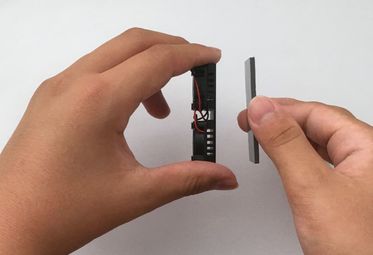
|
|
4. Paste the sticky side of the thermal tape which you have peeled to the bottom surface of the dual fan.
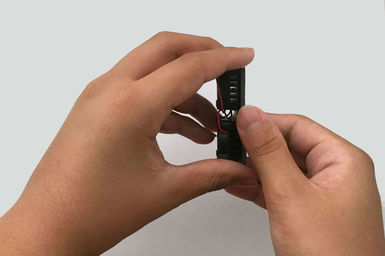
5. Next, peel the other side of the thermal tape which is the one exposed and not the one stuck.
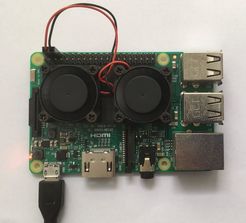
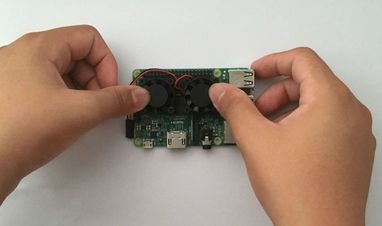
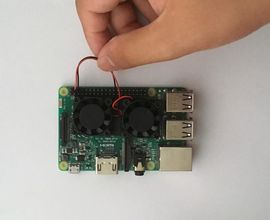
6. Position the dual fan above the two chips (the main processor and the Ethernet chip) on the Raspberry Pi with the wires facing towards the set of pin headers as seen by the pictures above and below.
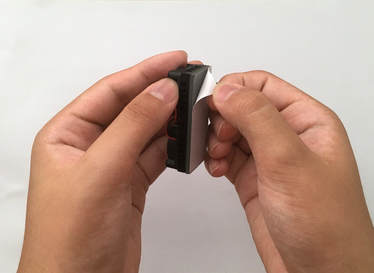
7. Quickly paste the dual fans onto the Raspberry Pi in one, rapid motion.
|
|
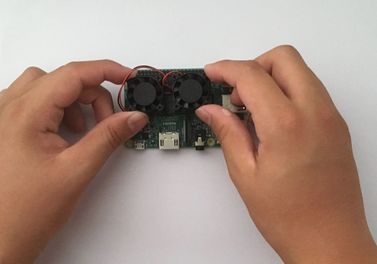
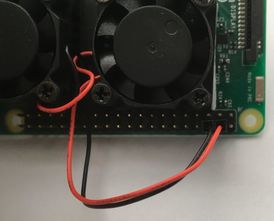
8. Connect the fan's pins to the 5v and GND pins on the Raspberry Pi as seen by the images above.
conclusion
From the test results and my experiments, this dual fan really helps with the heat dissipation through the use of active cooling rather than the ordinary aluminium heatsinks which doesn't help that much. This product is widely used in executing various games and scripts which requires a lot of power to run, and it often results in heat which can lead to the Pi crashing. All in all, I think that this product is an excellent solution to many overheating issues.
Make sure you check out the review for this product by clicking here.
