
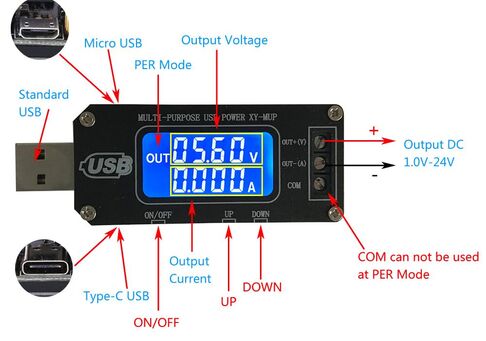
introduction
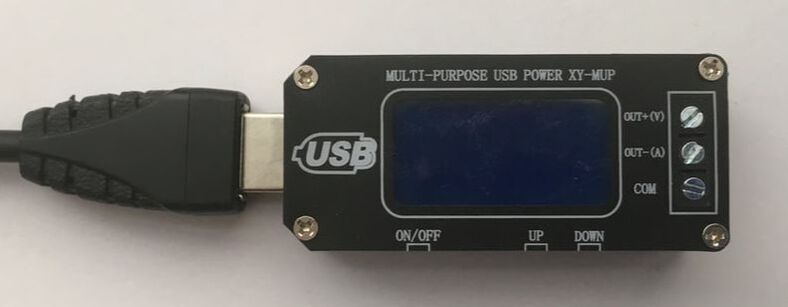
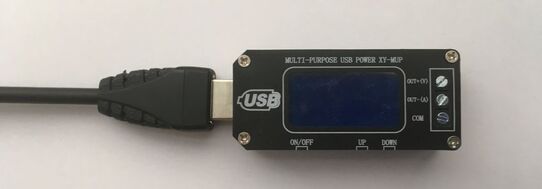
The XY-MUP, a USB DC-DC Buck Boost Power Supply Module from ICStation, combines the features of a standard buck boost converter, voltmeter/ammeter and a thermometer together, which all can be helpful tools for all makers. Its ability to effectively take a voltage and easily boost/buck it to a different voltage, or to measure voltage/amperage puts so many functions in a single, compact module. This module has two modes, power output mode (PER Mode) and multi-function meter mode (VAH Mode), which can easily be interchangeable, depending on what you require this module for. This device additionally has three different USB input ports, three function buttons and an LCD screen to display all the necessary information needed in the different modes. Its output can also be used as an input to measure voltage, current, battery capacity and more, as well. In this tutorial, there will be a walkthrough to all of the functions of this module and how to use them with visual and wiring diagrams provided. The pictures below show the XY-MUP module being used in both of the modes with all of the functions being used, along with a exterior hardware tour of this module:
|
|
|
|
|
|
Per mode: Bucking/boosting voltage
|

|
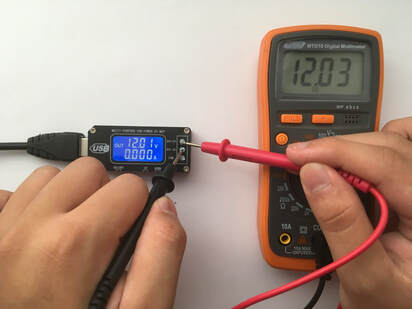
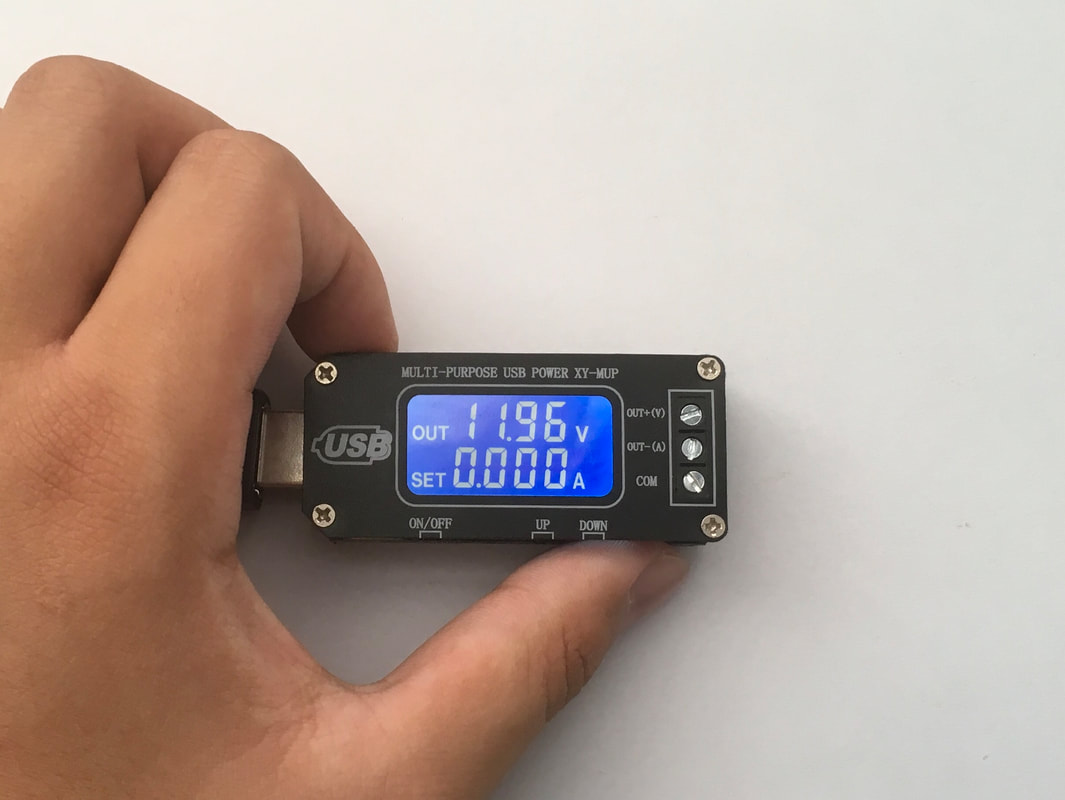
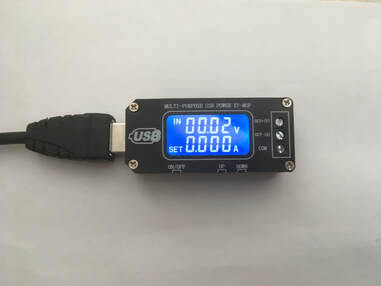
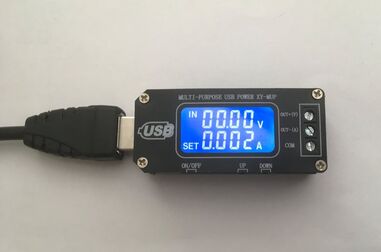
1. First, you will need to supply the module with some input power (3.5 - 12 volts) and this can be fed through its Type A, Type C or micro-USB port. For these examples and images, power will be fed through the module's USB Type A port. Upon powering it up, the display will read "PER" as the PER Mode (Power Output Mode) is the default mode upon starting up this module for the first time.

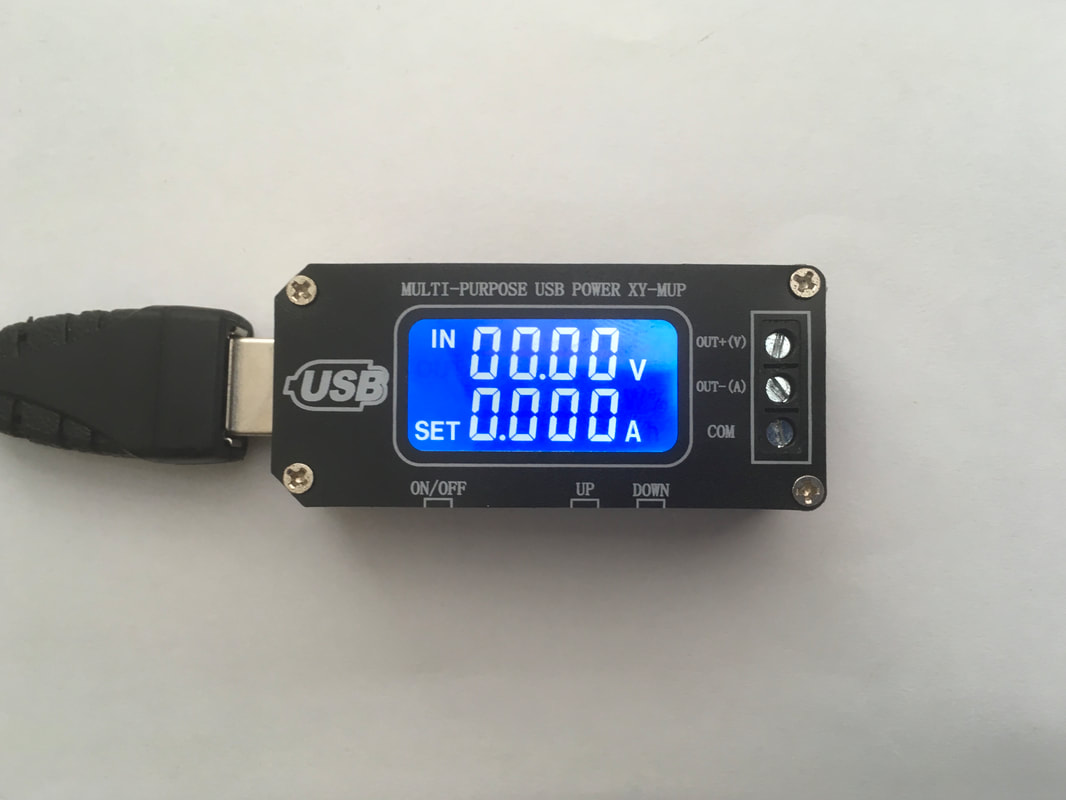
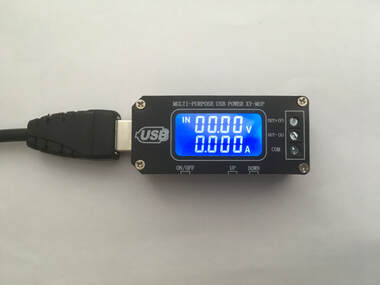
2. Upon startup of this module, you will see the text "OUT", meaning that this is PER Mode, where you can boost or buck voltages. You will see the voltage reading set to zero as your output isn't on, with the current set to zero as well, because no load is connected.

|

|
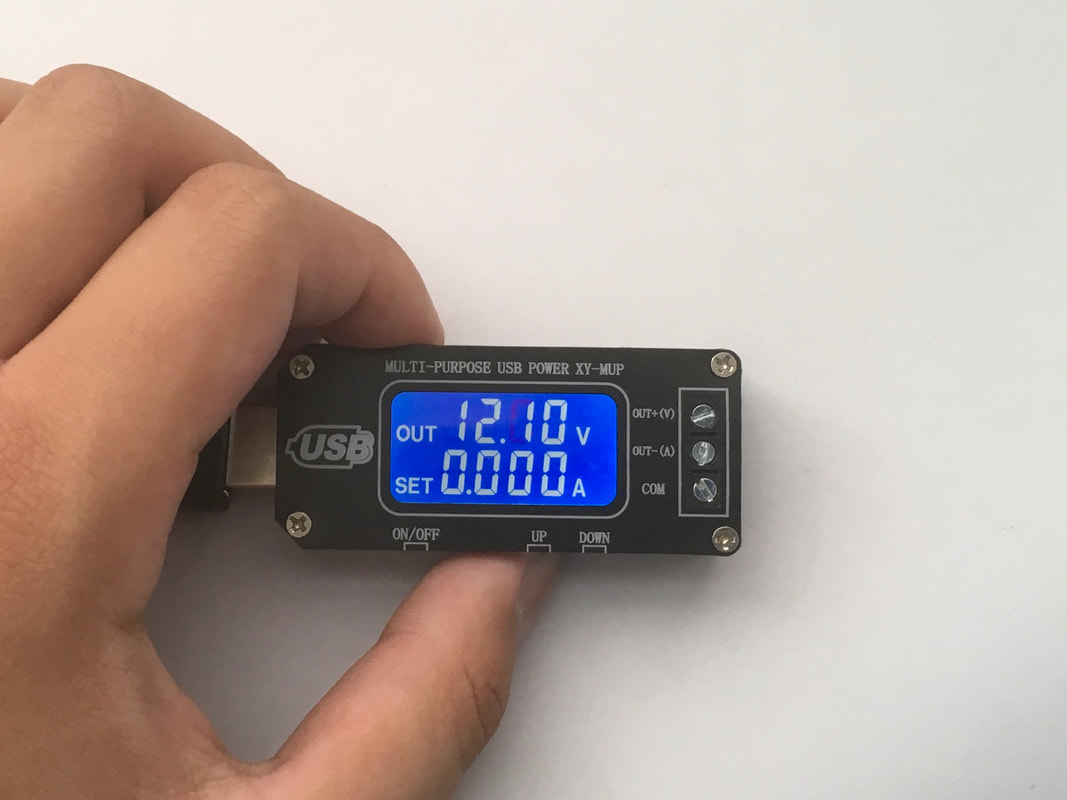
3. If you press the "ON/OFF" button on the module, this will switch the output on, meaning that the designated output voltage which you have set will be outputted to your load. The output current reading will be blinking when no load is plugged in and when the output is off. When you switch on this module, the output will be off by default, so the voltage reading will be at zero volts but when the output is on, the voltage reading will display your set output voltage.
|
|
4. To set the output voltage, you will need to turn the output on by pressing the "ON/OFF" button once. Then, you can either press the "UP" or "DOWN" button until you have set the designated output voltage, you should see the "SET" word come out on the screen indicating that you can now change the voltage. You can additionally hold either button to speed through the voltages faster. This module can buck and boost voltages so the output voltage can range from +1 - +24 volts. Once you have set the voltage which you want, leave the buttons for 2 seconds to set it in place.
|

|
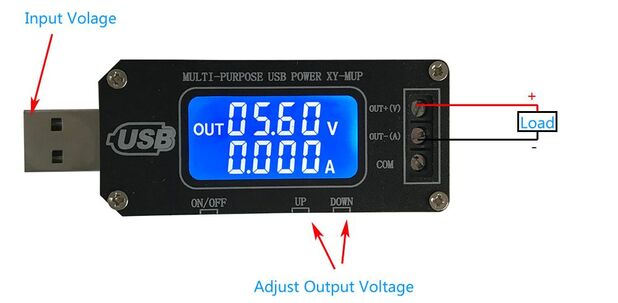
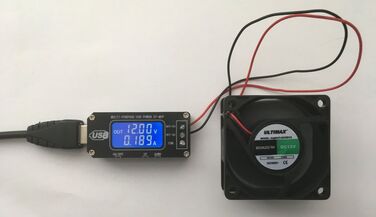
5. Now, you can connect your load. You will see the current being drawn from the module's display, but make sure your load can handle the voltage being outputted. The third picture above shows the wiring diagram for your load in this mode.

6. If you want to see the power being drawn, make sure your load is connected and your output is on, then hold the "ON/OFF" button for 2 seconds to display the output power, instead of the output current. You can do this again to switch back to displaying the output current.
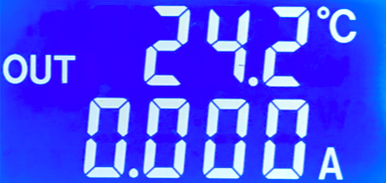
7. In this mode, you can also view the ambient temperature which the module senses. You can do that by making sure the output is off, then pressing the "UP" or "DOWN" button once. You will immediately see the ambient temperature in degrees celsius. The current reading will be blinking, but you can ignore the current reading as your output voltage is off anyways.

8. You could also switch the backlight off on this module by pressing the "ON/OFF" button for 5 seconds. The module can still function and provide all of its normal features properly, even with the backlight off. You will probably want to turn off the backlight if you are working outdoors or when conditions are bright.

9. If you need to change mode on this module, you can do that by holding the "ON/OFF" button for 10 seconds. This will switch the mode to VAH Mode, which is the multi-function meter mode to measure various things. More information about VAH Mode will be described in the below section.
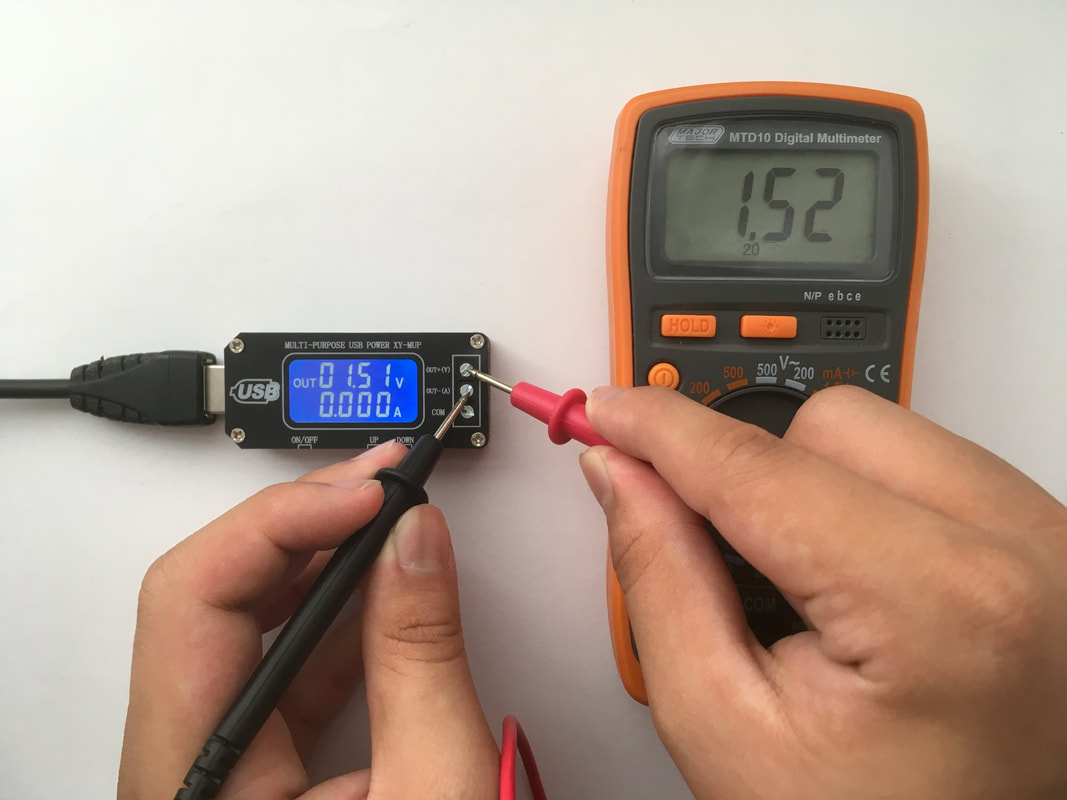
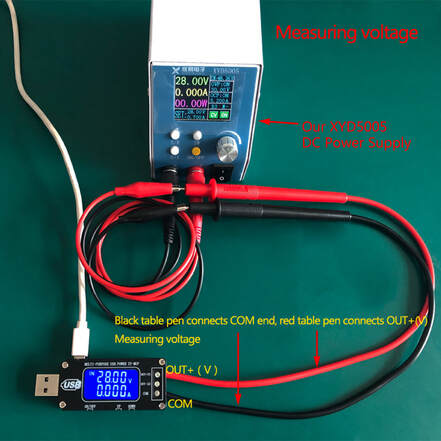
VAH MODE: Measuring voltage
1. First, make sure that there is an input power supply, from either of the three USB ports. I used the Type A USB port as an input power source in the picture above.

2. Then, make sure you switch to VAH Mode if you are not in it already. From powering the module up at first, the module will be set to PER Mode by default, but if you then hold the "ON/OFF" button for 10 seconds, you can switch to VAH Mode, which will be used to measure voltage.

3. From here, insert your voltage supply to ports "OUT+ (V)" and "COM". The "OUT+ (V)" port will be used for the positive connection of your supply voltage and the "COM" port will be used as a ground or negative connection for your supply voltage. The voltage reading should immediately be displayed as shown in the picture above.
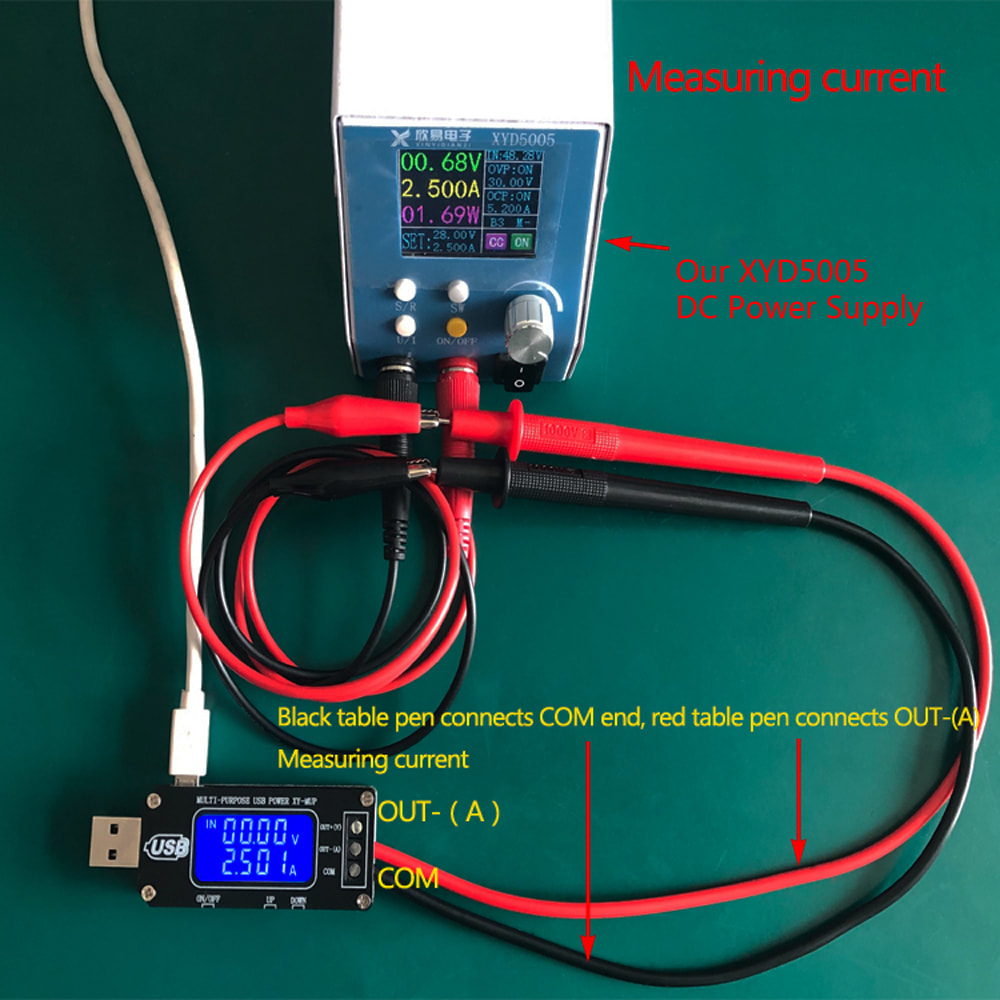
VAH MODE: MEASURING current
1. First, make sure that there is an input power supply, from either of the three USB ports. I used the Type A USB port as an input power source in the picture above.

2. Then, make sure you switch to VAH Mode if you are not in it already. From powering the module up at first, the module will be set to PER Mode by default, but if you then hold the "ON/OFF" button for 10 seconds, you can switch to VAH Mode, which will be used to measure current.

3. From here, insert your current supply to ports "OUT- (A)" and "COM". Since you will need to measure current in series with the positive line of a powered device or from a power supply directly, insert one end or the positive line of your power supply to the "OUT- (A)" port and the other end of the positive line of a powered device or the negative line of a power supply to the "COM" port. You should immediately see the current reading directly on the display.
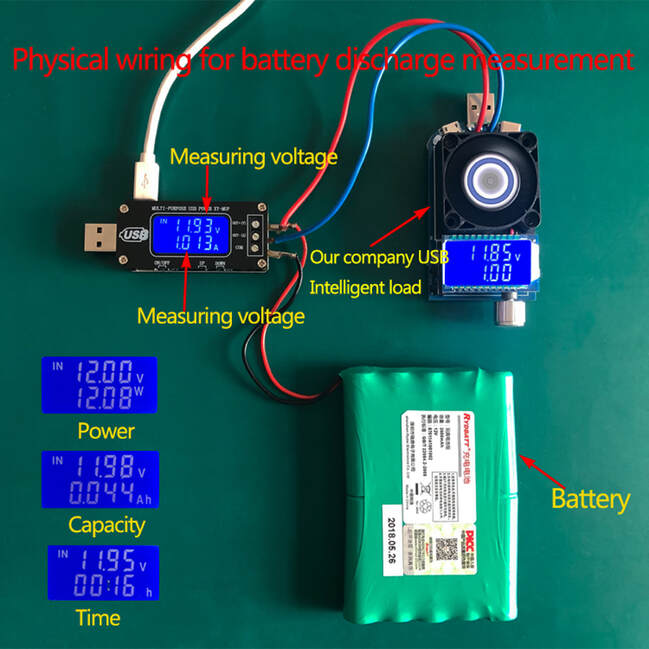
VAH MODE: MEASURING power, capacity and discharge time
1. First, make sure that there is an input power supply, from either of the three USB ports. I used the Type A USB port as an input power source in the picture above.

2. Then, make sure you switch to VAH Mode if you are not in it already. From powering the module up at first, the module will be set to PER Mode by default, but if you then hold the "ON/OFF" button for 10 seconds, you can switch to VAH Mode, which will be used to measure power, capacity and discharge time.

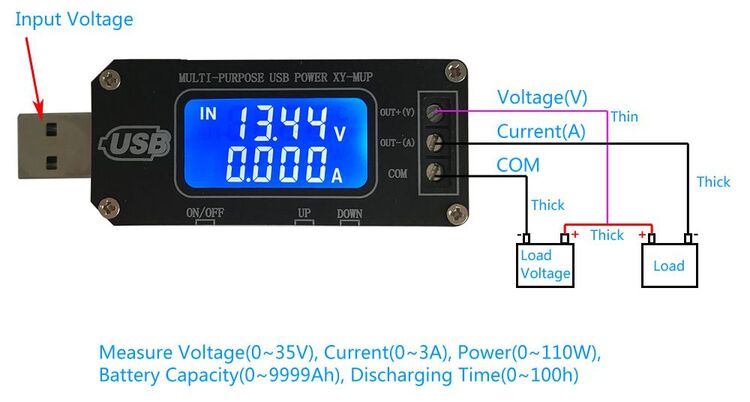
3. From here, insert your load, power supply and/or battery pack into the module according to the wiring diagram image above. You will need to connect the positives of both your power supply/battery and your load together as that connection will go to the "OUT+ (V)" port . The ground connection of your power supply/battery will go to the "COM" port and the ground connection of your load will go to the "OUT- (A)" port. You can then press the "UP" or "DOWN" button to switch the display reading to view the capacity, power or discharge time.
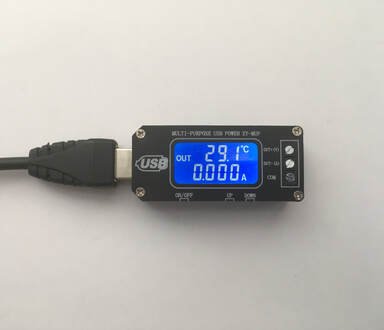
VAH MODE: MEASURING temperature
1. First, make sure that there is an input power supply, from either of the three USB ports. I used the Type A USB port as an input power source in the picture above.

2. Then, make sure you switch to VAH Mode if you are not in it already. From powering the module up at first, the module will be set to PER Mode by default, but if you then hold the "ON/OFF" button for 10 seconds, you can switch to VAH Mode, which will be used to measure temperature.

3. To display the ambient temperature that the module is sensing, you will just need to click the "ON/OFF" button once and the temperature in degrees celsius will be displayed.
calibrating the voltage and current

|
|
1. Before powering up the module, hold the "ON/OFF" button then power up the module while still holding the "ON/OFF" button for an additional of 5 more seconds. This will take you to a screen where the voltage reading will be flashing first, as this is the calibration display screen.
2. Now, you can press the "UP" or "DOWN" button to set the voltage uncertainty/offset.
3. To set the current uncertainty, press the "ON/OFF" button once and the current reading will now start blinking. Just like the calibration of the voltage, you can press the "UP" or"DOWN" to set the correct current uncertainty/offset.
4. If you are finished calibrating the voltage and current, you can hold the "ON/OFF" button for 2 seconds to get out of the calibration page and get back to VAH or PER Mode.
conclusion
The XY-MUP USB DC-DC Buck Boost Module and Multi-Function Meter in my opinion is a phenomenal piece of lab equipment from ICStation which combines modules like the well-know, cheap "USB Doctor" and a standard buck boost converter which is something like the module in GE Project 001. With this small device, it enables me to monitor and get a sense of how much current my load is draining, how much capacity my battery has, or even if my 18650 cell has an issue. Specifically what I like about this module is how easy it is to access all of its modes, especially since there are tons of features. Its three USB input ports are also handy when working with modern computers, phones, power banks etc. Overall, I am really impressed with this cheap module from ICStation, because of its features, user-friendly design and price (under $8).
Seeed Studio Fusion PCB Assembly Service takes care of the entire fabrication process from PCB manufacturing, parts sourcing, assembly and testing services, so you can be sure that they are getting a quality product. After gauging market interest and verifying a working prototype, Seeed Propagate Service can help you bring the product to market with professional guidance and a strong network of connections.
Make sure you check out the review for this product by clicking here.
