
BEFORE STARTING THIS PROJECT...
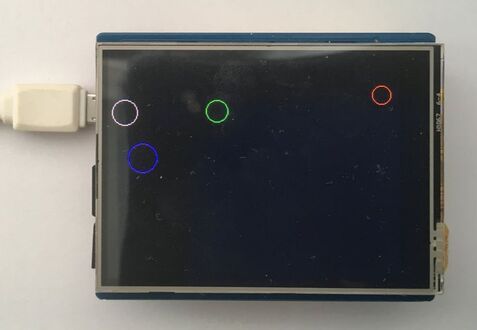
In this Arduino project, a TFT display will be used, which is essentially another screen like an OLED or a common LCD display to show information, graphics or animations as well. Since you will just be getting introduced to this TFT display module which is made into a shield form to perfectly fit an Arduino Uno, the sketch which we will be using will display a simple demo program to show its quality, resolution and ability to show multiple colours as well. Additionally, this module has a resistive touch feature, where the whole screen can be used to play games or to work as an automation system control with interactive buttons. However, this is not a capacitive touch screen so it will defer in sensitivity when compared to your phone, as resistive touch screens rely on mechanical pressure as opposed to natural conduction from your body. For this project, here are the components which you will need:
- 1 2.8" 240x320 TFT LCD Display Module with Resistive Touch
- 1 Arduino (the Seeeduino v4.2 is used in this example)
- 1 USB Data Cable (depends on the Arduino)
- 1 2.8" 240x320 TFT LCD Display Module with Resistive Touch
- 1 Arduino (the Seeeduino v4.2 is used in this example)
- 1 USB Data Cable (depends on the Arduino)
MOUNTING THE CIRCUIT
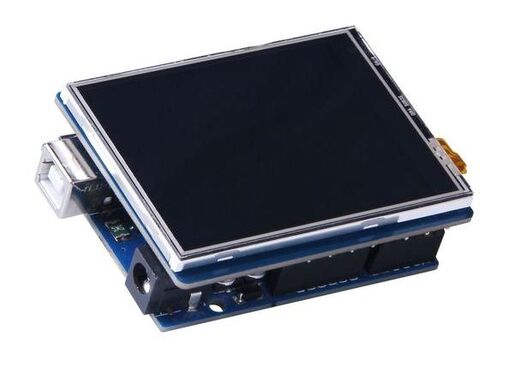
This project's circuit is by far, the easiest to mount as this shield comes prepared to be fitted onto an Arduino Uno. Each pin on this shield should go into every pin on the Arduino perfectly and I recommend that you line it up carefully before applying pressure to press the display down into each of the pins. However, this LCD module also has a 6-pin ICSP (In-Circuit Serial Programmer) header which matches the male ICSP header pins on the Arduino, thus, ensuring that you match those pins up as well is critical to making sure that you mount this module correctly. Remember, don't use too much force on the module as it may damage the pins or the display itself, so be careful! Then, once this module has been mounted on to your Arduino board, plug in your USB cable and you are now ready to go. For this project, you will not be importing files into the SD card, so taking out the SD card from this module is not necessary.
the code
Please download the three code libraries from the link given before compiling and uploading the program: https://bitbucket.org/displaymodule/dmtftlibrary/src/master/
Arduino TFT LCD Display Module with Resistive Touch Project Code
ABOUT THE CODE
With DisplayModule's DMTFTLibrary, the software part of this project is made 10x easier due to no manual coding needed for each function performed. DisplayModule has also already written the main part of the code, so that will save you some time if you need to use this code again. Firstly, the code starts by defining some libraries used: we declare the SPI (Serial Peripheral Interface) library for communication between the TFT and the Arduino, the DMTFTIli934 library, which is used to drive the TFT with an Arduino and the BubbleDemo library, which is basically the library which stores all the code for this program. Then, we define some pins which aid in the software communication to the TFT display. We mention the TFT chip select pin on pin 10, the SD chip select pin on pin 8, the flash chip select pin on pin 6 and the touch screen chip select pin on pin 4. After that, we now add in a line where we declare the TFT being used with the chip select pin on pin 10 and the data/command (DC) pin being on pin 9 and on the following line, we mention that the bubble demo program will be used, which will consume the whole TFT display's length and width. Now, the void setup section is present, where we set the TFT_CS, T_CS, SD_CS and the F_CS pins as output pins, so that data will be fed into the Arduino from the TFT display. Next, we declare the same set of pins high, meaning that they will be turned on, active and performing their individual function during this sketch. We then also initialise the display to start it up, which transitions us to the void loop section, with one command only. This command is to basically run the bubbleDemo program for 750 loops with a delay time of 20 milliseconds. Now, the software part has been already done and your program should be up and running fine!
