Arduino Usb Connection
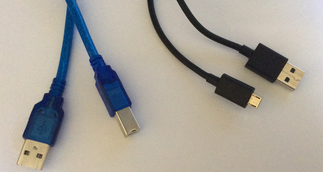
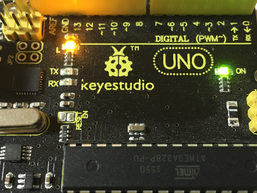
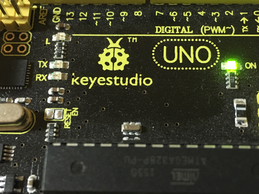
The first step is to get a USB cable the same size as the connector port on your board, for example the Arduino Uno needs a Type-B USB data cable. The Arduino Due has two USB ports (Native USB and Programming) but needs a Micro-B USB data cable, plug your cable in either ports. Connect the USB to your computer's USB port and make sure the green LED on your Arduino is blinking. Always check for any damages to the board before using the board in case they gave you a damaged board. If you don't have the right cable, you can power your board by an external power supply using a battery box with 6 AA batteries or 9 volts. To spot fake/counterfeit boards click here: https://www.arduino.cc/en/Products/Counterfeit
Arduino IDE (INTEGRATED DEVELOPMENT environment)
To upload and write codes to the Arduino, you need a software that can be specially for the Arduino, so that is why they created it. The software can compile, upload and save the code to the sketchbook. The IDE can be downloaded onto computers programs like Windows, Mac and Linux. In this example we will be using Windows. In order to download this software, this website can be used to download it which can be found here: https://www.arduino.cc/en/Main/Software
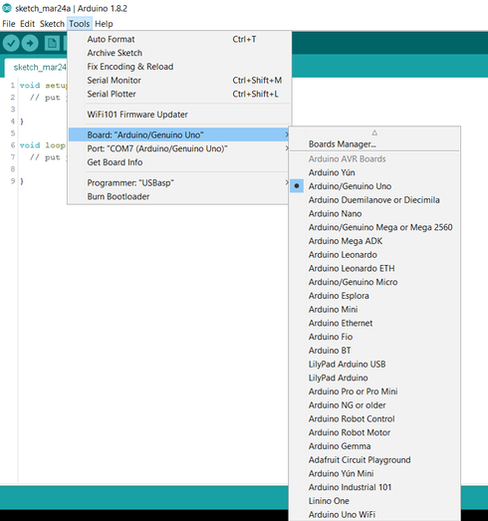
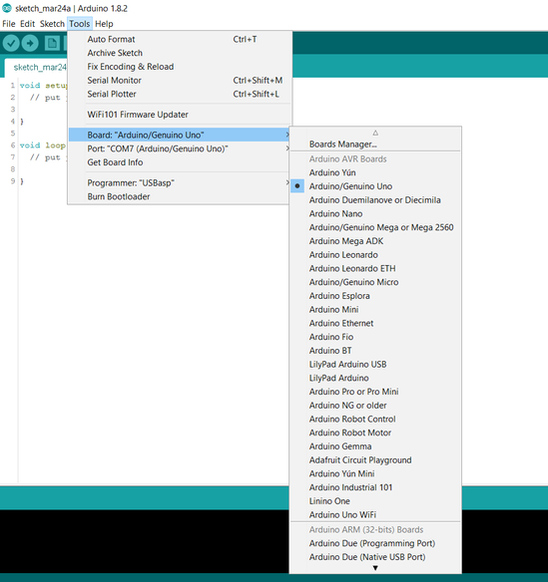
In this example, I will be downloading The Arduino IDE to the Windows operating system, other downloads may vary in instructions. The first step is to download the software by clicking on Windows Installer. Next it will take you into a ZIP file. Extract it out and place it onto your computer. It can be a file in a folder or a file by itself. Click the file to open and click to the application to open. Once the IDE is open, plug in your Arduino board. Go to Tools > Board > and select your board. Then, go to Tools > Serial Port > and choose the port your board is plugged into. For any other boards, you will have to download drivers.
In this example, I will be downloading The Arduino IDE to the Windows operating system, other downloads may vary in instructions. The first step is to download the software by clicking on Windows Installer. Next it will take you into a ZIP file. Extract it out and place it onto your computer. It can be a file in a folder or a file by itself. Click the file to open and click to the application to open. Once the IDE is open, plug in your Arduino board. Go to Tools > Board > and select your board. Then, go to Tools > Serial Port > and choose the port your board is plugged into. For any other boards, you will have to download drivers.
Setting up the drivers
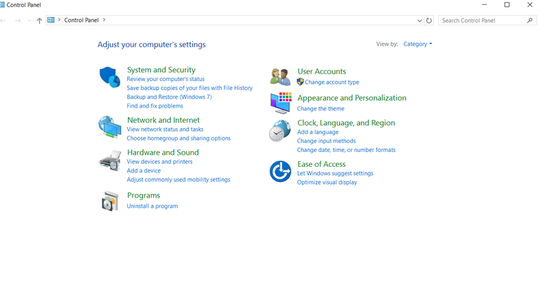
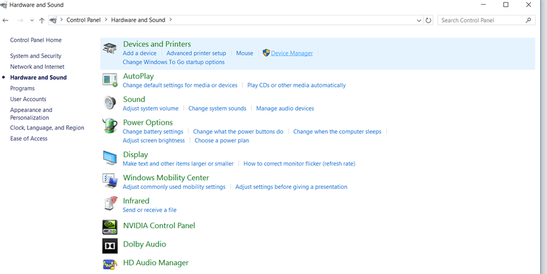
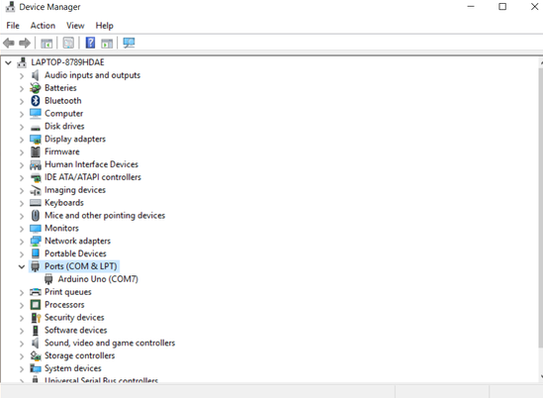
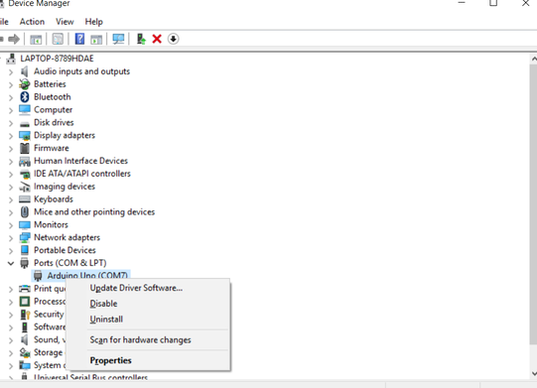
The downloading of drivers is easy. This is the procedure if the IDE doesn't recognise the board you are using. For example, when you plug in the board, it fails the process by disconnecting. Normally, Windows Installer will download drivers automatically when starting the problem. If the program does not identify the board, downloading drivers is essential for you getting started. Plug in your board before getting started. First, open up Control Panel on your computer by clicking the bottom-left Start Menu. When, in Control Panel, one subtitle is System & Security; click that then click only on System. Once in System, go to Device Manager and from Device Manager, go to Ports (COM & LGT). From Ports, underneath should show Arduino Uno; click on Update Driver Software by right-clicking it. By clicking on that, it will take you through a process on the downloading automatically. First, click No, not this time for one of the pages. The other page you will get an option of Install from a list or specific location, click that. When you get to a page where it asks you to select a specific file, browse your files and choose the one where all your hardware is located by selecting two options from that page; Search for the best driver in this location and Include this location in the search. Otherwise, select the file and continue. The next page will inform you of the installation, just wait for a moment and it will finish. The process is finish and if you go to the IDE, it will identify the board now. By clicking this link, you will be able to look at the steps with pictures: https://www.arduino.cc/en/Guide/UnoDriversWindowsXP
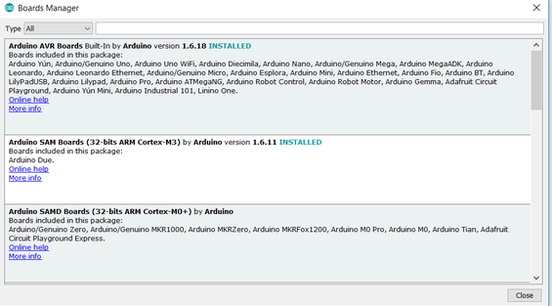
This method is easier for downloading and installing drivers. It is way faster plus not so complicated. Boards like the Arduino Yun, Uno, Duemilanove, Diecimila, Nano, Mega, Mega 2560, Mega ADK, Leonardo, Micro, Esplora, Mini, Ethernet, Fio, BT, Lilypad Arduino USB, Lilypad Arduino, Pro, Pro Mini, NG or order, Robot Control, Robot Motor, Gemma driver is already installed automatically; others need to download manually. First, go to Tools -> Boards -> Boards Manager. You will reach a box listing all different boards but just search it up in the top-right search box. Once you find the right board in the description of the box; click on that button that states Install. After the installation, the top right of the box will say INSTALLED in blue. After installing, close a Boards Manager and restart the Arduino IDE. Once fully started again, go to Tools -> Boards, and then there will be your board. Now choose your board and it will be all set up.
testing the board
Once you have completed the above, you will have to test the board. Plug your Arduino board (I'm using a Keyestudio Uno) in your computer and open the Arduino IDE. Then go to File -> Examples -> 01. Basics -> Blink. By clicking Blink, you will have a new sketch open. Upload the sketch to the board. After uploading, the L (on-board LED) should be on for a second then off for a second. If you reset, the board, the LED would blink rapidly then start the process again. By this simple sketch, you now know the board is fully functional and operational. The explanation will be below the pictures. Look at the images below for the circuit uploaded onto the board:
After overseeing the circuit, we now have to look at this simple code. It starts with comments by the creater and information which is all ignored by the IDE. Comments usually start with // or /*. Look out for these symbols because it is not part of the code. The first line of code is void setup, codes must have two parts; void setup and void loop. The void setup is the parts which runs one time and void loop runs over and over again. In this particular code, under the void setup declares that the pin 13 LED (L) is going to sent data out (OUTPUT) which is what makes the LED blink. Now we know what we are controlling, but what are we going to do. The second part of this code is void loop. The LED blinks infinitely which is a loop. First, it turns the pin 13 on HIGH which is to power it which means it's on. DigitalWrite is just a function declaring what to do with the LED, then we code results we want. The second line of void loop is a delay line which is like pausing music; it stops the circuit. We set the time to a second which is 1000 milliseconds, milliseconds is what we use when telling the IDE to stop the circuit. After that line is another line like the first line but telling the IDE to put pin 13 to no power which means it's off. Finally the code is complete. That section repeats until the Arduino board loses its power.
to edit.
to edit.
